Custom views in Jetpack Compose (Interoperability) — Part 1
Compose with custom views and XML
Interoperability — Which means how well the new APIs work with the existing APIs. It’s important that the backward compatibility should be easier, otherwise if it’s hard perhaps nobody’s going to do it.
Compose has done a wonderful job on interoperability. And we are going to see how.
In first part of this article we will see “How to add a custom view written in java or Kotlin into compose” . And in the second part we will see how to add compose in existing Views.
Note: If video works for you better , following is the video form of this article:
https://www.youtube.com/watch?v=PyD0yeU9hrg
Add Custom view in Compose:
While working with compose, we might have a scenario where a custom view like MapView or an AdsView is required in the layout. At the time of writing this article, Compose is not supporting building these views using composable. Fortunately, there’s a work around to add any such custom view directly into composable tree.
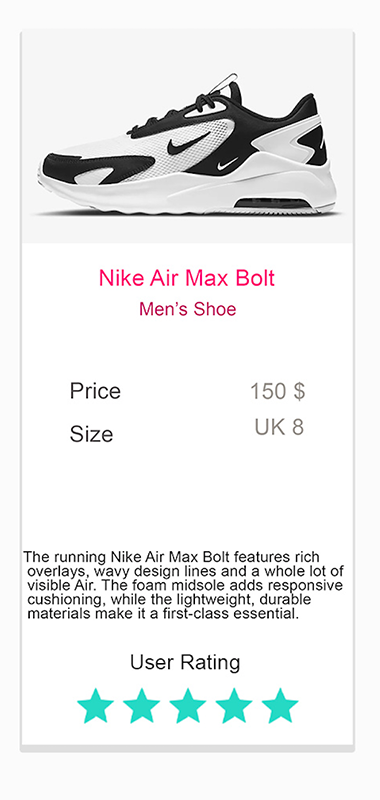
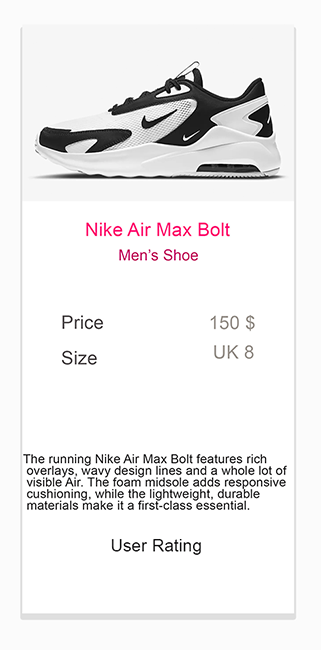
In Episode-1 of compose series on YT, I made a sample layout using compose. Now for this part, we will add a custom Textview and a custom RatingBar.

The code for the image on left is following and the image on right is the targeted layout with custom views inside.
1. Add Custom TextView
Okay now the target is to add our first custom textview. I’ve made a very basic Textview in Kotlin:
i) Okay, now to add it (or any other custom view) to our compose layout the first step is to make an object of this textview:
val customTextView = CustomTextView(LocalContext.current, "User Rating")ii) The second & final step is to use this function called AndroidView and pass the customTextView parameter to it. AndroidView is the magic function provided by Jetpack compose, to create custom views for you. This function takes custom view as parameter along with some other parameters like Modifier etc. So the code we will add the following line :
AndroidView({customTextView})And Tadaa..! We’re done . Simple as that. Our Layout Looks like this now. And Remember we added both of these steps in column, so our layout is vertically aligned.
2. Add Custom Rating Bar Made in Java
Now we need to add our second Custom View, which is a rating bar made in Java and publicly available here.
Now again, just like what we did in step 1 above, First let’s create an object of our Custom Rating bar :
val customRatingBar = MaterialRatingBar(LocalContext.current)
customRatingBar.rating = 5f
And now using the same AndroidView function, let’s call it and pass it the custom rating bar.
AndroidView({customRatingBar}) And we’re done. But to center align this Rating bar horizontally, we can pass modifiers as a second parameter to this function, because remember ? AndroidView is just a function we’re calling and passing our custom view.
AndroidView({customRatingBar}, modifier = Modifier.align(Alignment.CenterHorizontally))If you’ve confusion on how to align children inside column and rows, you can watch my tutorial on YT.
And that’s it. We’re done. Our final code looks like this:
In the next part of this article, We’re going to see how to add compose in an existing XML. Don’t forget to leave an engagement in the form of Clap or a comment on my youtube channel ;) I’ll see you in the next article.
Code is uploaded on Github here
Final Result: